During my stint in grad school, while living in Boston, I'd do just about anything to get out of writing a paper or preparing for my Master's recital (hmmm...maybe I should have taken that as a hint that I was just not that into my degree program, vocal performance). Unfortunately, I didn't start my baking mania until after I left the apartment that had a large kitchen. No, that started when I had a kitchen as small as a hall closet. One of my grad school friends had a roommate who made delicious biscotti. I wasn't bold enough to ask her for her recipe, but instead mentioned it to my favorite baking teacher, my mom. She found recipe after recipe and sent them to me. So, on my one-foot-square countertop, I made my first batch of biscotti. And, fell in love.
The recipe I prefer is really a mandelbrot (the Jewish version of biscotti, which literally means 'almond bread', since almond was the original flavoring in this crispy treat). Mandelbrot has only eggs in it to hold it together, while biscotti tends to also include butter or oil, which make them a little more like dried out cake or bread. While this is a lovely texture, I find that they leave more soggy crumbs in the bottom of my teacup than I like. If you're looking for a good biscotti recipe, I like to explore Allrecipes.com for something that fits my needs (allrecipes.com biscotti recipes). I love checking out the reviews for other bakers' comments to determine if it's a good recipe or not.
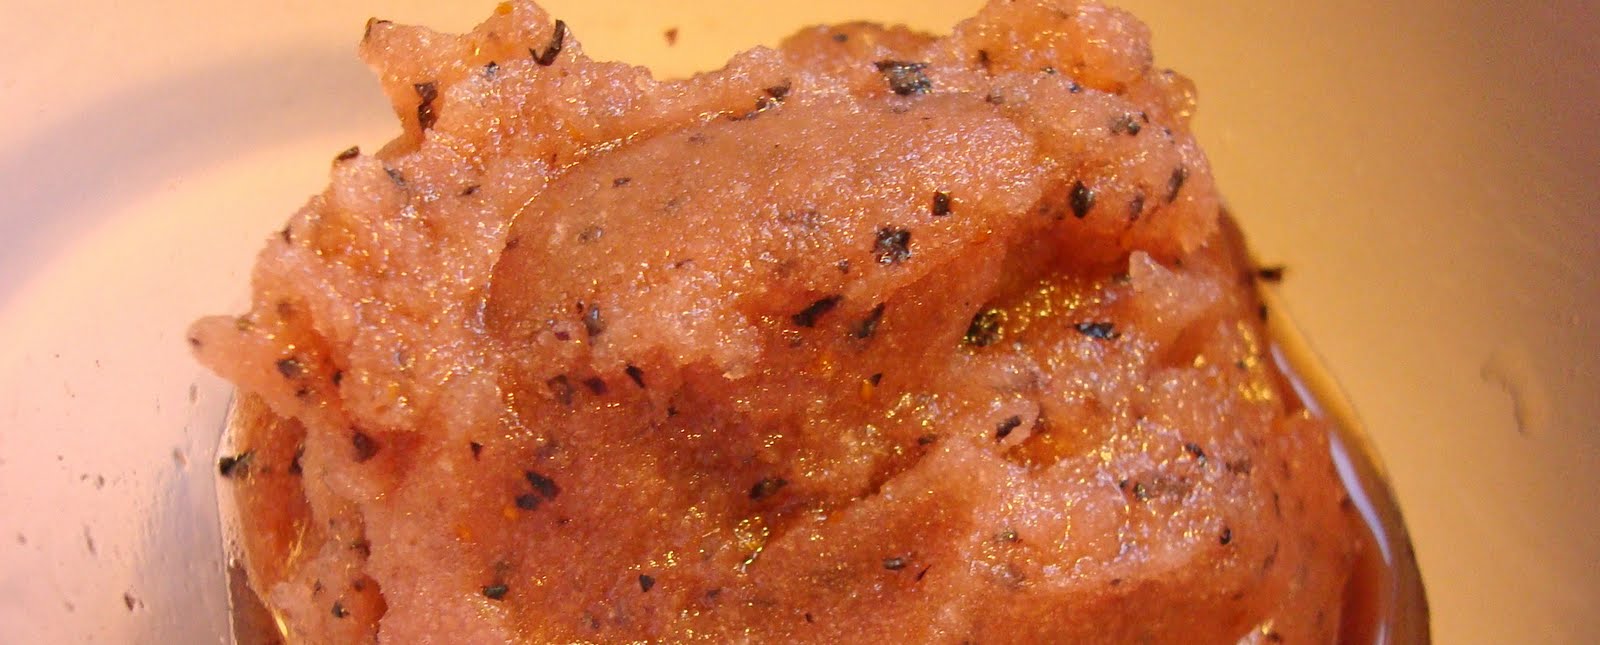
I've moved several times over the years, from Boston, back home to Minnesota, with apartments and homes all over the Twin Cities, only to end up with yet another small kitchen (see the photo above, with the 'friendly sink' of warm, soapy water). This time, my counter could have more than 4-square-feet of space, if only I didn't clutter it up with a toaster, a big jar full of utentils and a cluster of unwashed dishes (usually teacups from the day before). I'm right back to where I started, then, with one-square-foot of space in which to make my mark on the baking world.
The recipe that follows is from my early Bramblewood days, when I was mainly delivering to coffee shops. One of the shops decided to do a dunk test, with my biscotti up against another popular biscotti, dipped for a good dunk in a cup of joe. While both held a nice amount of coffee, mine didn't leave as many crumbs as the other biscotti. Again, even though their biscotti was delicious, it had that cakier texture that crumbles more easily under super-dunking conditions. Not that my biscotti is break-your-teeth hard; rather, it is dense and crispy.
Cherry Apricot Biscotti
3/4 cup chopped dried tart cherries (or craisins)
3/4 cup chopped dried apricots
1 1/2 tsp orange extract
2 cups all-purpose flour
1 cup granulated sugar
1 1/4 tsp baking soda
pinch of salt
3 large eggs
1/2 tsp vanilla
2 tsp fresh orange zest
Preheat oven to 325 degrees.
In a small bowl, combine cherries, apricots and orange extract. In a mixing bowl, place flour, sugar, baking soda, salt, orange zest and fruit mixture. Stir to combine. In the fruit mixture bowl, beat eggs and vanilla lightly. Blend the eggs and vanilla into the dry mixture.
Turn dough onto a well-floured surface. Lightly knead dough to form a smooth surface and cut into two equal portions. Elongate dough to form two long logs. Transfer to a parchment covered baking sheet and flatten logs to one-inch high and 4-inches wide.
Bake for 40 minutes, until light golden. Dough should spring back to the touch.
Cool for 5 minutes, until cool enough to handle (do not cool completely, though, since it will be tougher to cut). Transfer to a cutting board. With a sharp, serrated knife, cut each loaf into 1/2 inch slices.
Place biscotti, sliced side up, on the baking sheet. Bake for 15-20 minutes more, or until golden brown. Flip the biscotti halfway through the baking time. They will still be soft when they come out of the oven - they'll harden as they cool.
Store in an airtight container. If they soften (due to humidity), bake at 350 for a few minutes to crisp them up.
Yield: around 36 biscotti
Variation: Triple Chocolate Biscotti. Instead of fruit, orange extract and zest, add 1 1/2 cups toasted and slightly chopped almonds,1 1/4 cups slightly chopped chocolate chips, and 2 tbsp really good cocoa powder. After they are twice-baked and cooled, dip them in melted chocolate.
A quick tip for melting chocolate chips: place the chips in a bowl and microwave on 50% power for one minute, then stir. Continue microwaving in 30 second increments, until the chips can barely hold their shape. Remove and stir until smooth. Throw in a small handful of chocolate chips to bring it to the right temperature. Any water that accidently gets into the chocolate at this point will cause it to seize, and you won't be able to fix it (but you could add cream and turn it into sauce for ice cream!). Also, the almonds really should be toasted prior to baking with them. They have so much more flavor and crunch than their softer, raw predecessors.
So, if you're thinking your kitchen is too small or that you don't have the skills to bake or any other excuse that might keep you from making these easy, satifying biscotti, take a look at the picture at the top of this blog post. Because, I started small in so many ways and now big things come from that small kitchen.
P.S. Just so you know, I did finish graduate school and am the proud holder of a Master's Degree in Vocal Performance from New England Conservatory. Fat lot of good it did me. I still ended up baking...and happier for it.
Tuesday, February 22, 2011
Tuesday, January 18, 2011
Makin' Whoopie......Pies
It's hard not to pay attention to foodie trends when your life is all about food, like mine, most of the time. And, in the Midwest, we seem to join those trends part way through the game. So, what's new and exciting to us might be old news to our coastal friends. Cupcakes have been at the forefront for the last few years (trend spotters should already know that cupcakes exploded onto the scene in 2003, with the opening of Sprinkles in Beverly Hills, CA). Here in the Twin Cities, where the trend has been very strong for a few years,we have no less than a dozen bakeries featuring the single-serving sweet treat. (Here's a great article from Slate.com on the cupcake bubble, written in 2009, a lifetime ago when talking about fads: http://www.slate.com/id/2227216/)
French macarons have been tres chic for several years, too. Personally, I've been hoping for a Coconut Macaroon renaissance, myself, and have seen them showing up at many local bakeries. But, maybe I'm just hyper-sensitive to those little toasty delights since I've been immersed in them for the last year.
Whoopie Pies have been around since the 1930's, if stories out of Maine are to be believed. Or, are they originally from Pennsylvania? Or Ohio? No matter where they originated, they're here and they're teeth-achingly sweet and super easy. They're not quite a cookie, but are best described as two little mounds of cake with frosting in between.
I recently picked up a new cookbook, whoopie pies by Sarah Billingsley and Amy Treadwell (Chronicle Books, 2010) and tried the recipe for chocolate whoopie pies. I ended up varying the recipe, since I found the cake a little dry. Their combinations are interesting, though, and there are quite a few recipes to try. The traditional filling is made of Marshmallow Fluff, Crisco, and powdered sugar (find the recipe in the book above), but I love buttercream frosting. As long as it's fairly stiff, any frosting will work. I'm not always a fan of frosting, so I sometimes to eat the little cakes all alone.
Here's my version:
Chocolate Whoopie Pies
1 2/3 cups all-purpose flour
2/3 unsweetened cocoa powder (I like the cocoa from Trader Joes)
1 1/2 tsp baking soda
1/2 tsp salt
6 tbsp butter, room temperature (I use salted butter - I know, I know, not what a real pastry chef would use!)
2 tbsp vegetable oil (I use canola)
1 cup dark brown sugar
1 large egg
1tsp vanilla
1 tsp white vinegar
1 cup milk
Preheat oven to 375 . Line 2 pans with parchment paper.
Combine flour, cocoa powder, baking soda and salt. Stir with a wisk or sift to remove clumps. In the work bowl of a mixer, beat butter and oil until combined. Then add brown sugar and beat until fluffy. Add the egg and vanilla and beat for another 2 minutes.
Add the vinegar and half the flour mixture. Beat on low and add half the milk. Beat until just combined and scrape down the beater and the bowl. Add the rest of the flour and the milk. Beat on low until combined. Don't beat on high, as this will add air pockets. Let the batter rest for 5 minutes.
Drop by spoonful, or for best results, use a small ice cream scoop. You can even fill a pastry bag and squeeze more than a half dollar sized amount on the parchment paper. There should be at least 2 inches between each dollop. Bake for 10-12 minutes, until they spring back to the touch. Cool before filling.
Buttercream Filling
3 cups powdered sugar
1 stick butter, room temperature (again, I love salted butter for this)
3-4 tbsp heavy whipping cream (milk works, too - it just won't be as stiff)
1 tsp vanilla, or any flavoring you like (almond, rose flower, orange flower, peppermint)
In a medium size bowl, use a hand mixer (or a stand mixer) to mix the powdered sugar and the butter together (be careful not to turn it on too high or you'll be covered in white!). Add 3 tbsp of cream and vanilla and beat until smooth. Add the last tablespoon of cream if the filling is too thick. The easiest way to put the filling on the cakes is to put it in a thick plastic bag (like a Ziploc freezer bag), squeeze it towards one corner, cut the corner so the opening is about 1/2 inch wide, and squeeze gently (the sides will split, if you're not careful. Been there, done that).
The variations I have in the photo are Coconut Rose Buttercream and Malted Milk Buttercream. For the first one, I added sweetened shredded coconut, a pinch of dried, roughly ground rose petals (only use rose petals that haven't been anywhere near pestisides or other nasty non-food sprays - best to get some at a co-op) and about a tablespoon of rose water. If you want to be a coconut purist, use coconut milk instead of cream. For the Malted Milk Buttercream, I added a few tablespoons of Carnation Malted Milk (you can use the plain or chocolate version, or you can use Ovaltine). There are recipes for these and others in the whoopie pies cookbook.
To Assemble:
Turn half of the cakes bottom side up. Squeeze enough frosting on to cover the bottom (I work in a slight spiral to cover the surface). Top with another cake and gently press so the filling shows at the edges. If you want, roll the sides in toasted coconut or mini chocolate chips.
Share your yummy treats with friends, co-workers and neighbors, or hoard them all to yourself (that's fine with me. I like to know I'm not the only one not sharing). But, be sure to eat them up quickly. They don't have a long shelf-life. I'm in the process of testing one of my whoopie pies in the freezer to see how it holds up. I even have some plain cakes in there, which I'll defrost and then fill with fresh frosting at a later date, when I need a sweet treat. Which means, they'll be in the freezer just long enough to get solid before I yank back them out. I'm sure the fresh ones won't be around for long.
Saturday, October 23, 2010
Now, that's a cake of a different flavor
The Mill City Farmers Market recently celebrated 5 years of providing the Twin Cities with an incredible bounty of locally made and grown products from small farms and businesses. Sounds like a good excuse for a birthday party to me. Somehow, the staff at the market must have gotten wind that I like to make unusual birthday cakes, because they called on me to bring a market-inspired cake to the celebration.
Here's the story behind the game that goes on in my house, come birthday-time. When my husband and I first started dating, I asked him what kind of cake he would like for his birthday. Never one to give a straight answer, he said, "A lemon cake with potted meat frosting". I now know to call his bluffs, but at that time, I shrugged, bought a chocolate cake with vanilla frosting and served it. The next year, I asked the same question, got the same answer and promptly went to the store, bought a Pepperidge Farms Lemon Cake, spread a can of Devilled Ham on top and gave him his crazy cake. I thought that it would end right there.
The next year, when asked what he wanted for his birthday cake, my husband asked for a Cigar and Espresso Cake. This time, I took on the challenge with gusto and created a cake that tasted just like cigars and espresso. No, I didn't break a cigar into the batter (no carcinogens for the kids, thank you very much). I actually infused the dark chocolate ganache frosting with Lapsong Souchong, a smoked black tea, which gave it a perfect smoky taste the kids even enjoyed, and put some instant espresso in the cake. I won the challenge and haven't been able to make a plain cake since. Two out of my three kids now demand a custom birthday cake every year, too. Luckily, my stepson, who's birthday is the day after my husband's, loves the ice cream cake from Dairy Queen. My brain can only focus on one crazy project at a time.
So, when the market organizer called to see if I'd do the cake, I jumped at the chance. Instead of one offering, though, I asked if I could make two cakes. I just can't keep it simple, can I?
The first cake was inspired by that 1950s stand-by, Red Velvet Cake, which is so loaded with red food coloring you notice the, ahem, effects for many days. I used fresh beets, instead. The lasting effects might still be there, but at least it's natural and not red dye#40. I got the original recipe from my friend, Jeffrey Sherman Thompson, and made just a few adjustments .
Red (beet) Velvet Cake
3 ½ cups Cake Flour (Not Self rising)
¾ cup butter, room temperature
2 cups sugar
3 large eggs
¼ cup ground, uncooked red beets
4 tbs unsweetened cocoa
1 ½ tsp vanilla
1 ½ tsp salt
1 ½ cups buttermilk
1 ½ tsp cider vinegar
1 ½ tsp baking soda
350 oven. Butter and flour two 9 inch round cake pans or a 13x9 half-sheet pan. I like to use parchment, too.
Sift flour and set aside.
Peel a large, red beet and chop into small pieces. Grind in food processor until well chopped.
In a mixer, cream butter and sugar until light and fluffy. Add eggs one at a time. Add beets, including any juice that has collected, vanilla, cocoa powder and salt. Mix until well incorporated. (optional: add ¼ tsp freshly grated ginger for a slightly different flavor profile)
Measure out buttermilk then add to batter in 3 parts alternating with flour.
In small bowl, stir cider vinegar with baking soda. Add to batter and mix well.
Pour into prepared pan and bake for 30-40 min. Cool completely before frosting.
Cream Cheese Frosting
3-8 oz packages cream cheese, softened
½ cup powdered sugar
½ tbsp vanilla
Beat cream cheese in stand mixer until light and fluffy. Add powdered sugar and beat until well mixed. Taste mixture and add additional powdered sugar for a sweeter frosting. Add vanilla. Spread on cake.
1 cup butter, softened
4 cups powdered sugar
2 tsp vanilla
3-4 tbsp cream or milk
Beat butter in stand mixer until fluffy. Add powdered sugar and vanilla. Mix until well incorporated. Add cream to desired consistency.
In my next post, I'll include the recipe for my Zucchini Citrus Cake, the second of the two birthday cakes for the market celebration. My husband's birthday is only 10 months away. I wonder if he'd give me a hint now of what he wants. I did tell him he has to give me more than one week to create his cake. Let's see if he actually does that, or if I'll be scrambling to create the cake a day before his birthday. One can only hope.
Sunday, August 8, 2010
Frozen Blossoms
Standing at my booth at the Mill City Farmers Market yesterday, I looked over at my neighbor's booth and saw pretty baskets full of zucchini blossoms. They're in season right now for a short time. I've prepared the blossoms a number of ways, including stuffing them with herbed chevre, tossed in a little seasoned flour, and then fried in oil. Or, roughly chopped and added to a simple salad of tomatoes, cucumber, olive oil, lemon juice and balsamic. Lynne Rossetto Kasper, of public radio's Splendid Table, has a great recipe for pan-fried zucchini flowers. But, being in the sorbet state of mind, I started thinking about how to incorporate these beautiful blossoms into a frozen dessert. Zucchini Sorbet? No. Ah, cucumbers. Perfect.
Cucumber Lemon Sorbet with Zucchini Blossoms
1 cup granulated sugar
1 cup water
1/4 to 1/2 cup lemon juice
2 cups cucumber juice (4 small or 2 large cucumbers)
3 zucchini blossoms
Combine sugar and water in a pan and bring to a boil. Allow to boil for 5-10 minutes to create a simple syrup (make a little extra for sweetening your iced tea). Remove and cool. This should make around 1 1/2 cups of syrup.
Using a food processor, puree the skinned cucumbers. Strain through a sieve. For me, the easiest way to accomplish this task is to use a juicer, which has become my constant companion during my sorbet madness. Even with a juicer, I still take out the pulp and strain it for every last bit of juice.
In a separate bowl, add lemon juice, cucumber juice and 1 1/4 cup of simple syrup. Stir to combine and taste for balance. Add more simple syrup, if you'd like your sorbet sweeter. Be very careful not to over do it on the lemon juice. It gets more tart with the freezing process. The cucumber should be the main star here. Add 2 roughly chopped zucchini blossoms and the whole blossom (to infuse the mix). Stir and then chill for a few hours. Remove whole blossom before freezing in the ice cream cylinder. Freeze according to manufacturer's instructions.
If you are a fan of the Arnie Palmer, the iced tea/lemonade summer drink, not the golfer (is he really that refreshing?), use any leftover cucumber juice, lemon juice, and simple syrup to mix with your iced tea. It's a very refreshing cooler. Better yet, add a scoop of Cucumber Lemon Sorbet to your iced tea. Mmmm....that'll quench your thirst.
Monday, August 2, 2010
Love Connections
Eight glass pie plates, 3 small bundt pans, 1 four-cup measuring cup, 2 glass stacking bowls with lids, 8 plastic storage bins. This is part of my inheritance from Grandma Okland, my husband's maternal grandmother. While washing them tonight, I was struck with the link I now share with my husband's family. There is still a little flour left in one of the bins. I can't help but think that her hand had reached in that bin not too long ago while making one of her many treats. It's a lovely reminder of one of the connections Grandma Okland and I had - baking. When she found out that I loved to bake, she shared her recipes for thumbprint cookies and oatmeal bars with me. All written in her hand.
Family recipes, stories, and dishes (especially bowls) have always had a special place in my heart. My mom still has the tin pans that were specifically made, by the tinsmiths in town, for her mother when she married. The tinsmith asked what dimensions she wanted and he made them to order. My mom loves to make some of Nana's recipes in those tins, like Food for the Gods.
When my mom married, she didn't want any china or fancy dishes. She wanted a set of heavy pottery dishes with flowers drawn in the surface - certainly not the dainty china of afternoon teas and holiday meals. In time, though, she inherited the Spode china from my Nana and, when she married my stepfather, beautiful serving pieces from his family.
Our holiday table is a thing of beauty: Aunt Elizabeth's glasses, Nana's china, Grams' silver serving dishes and silver salt cellars grace the table. I now have a set of beautiful china from my mother-in-law that has been passed down through the generations. And, I have the dishes from Grandma Ginny, my dad's mother. I'm overrun, happily, with all sorts of memories which have landed on my table.
I have built my business, Bramblewood, on the foundation of a family recipe and techniques learned from my mom. The shortbread recipe I use is from a book of family recipes, all written in my Nana's hand. Every time I offer a piece of shortbread to a customer, I feel like I'm sharing a part of my family with them. Sounds like a cliche, but it's true. I often think of the invisible umbilical cord that connects my daughter to me, me to my mom, my mom to her mother, and so on. The dishes and recipes we share add a tangible love to that connection.
So, I think I'll find the recipe for Grandma Okland's thumbprint cookies and bake a batch this weekend. I'll teach that recipe to my kids in the hope that they'll continue our love of baking and sharing.
Wednesday, July 21, 2010
Swoon Song
As promised, I made a Watermelon Cucumber Sorbet with Basil. And, I think I swooned. Even my daughter was impressed, although I withheld the ingredient list from her until after she took her first bite. She's used to my penchant for combining unusual ingredients, but I never know when I've pushed it too far. It builds character, as my mom would say. Life won't be so shocking for her, since there are a lot of unusual combinations out there. Or, she'll yearn for a "vanilla" existence, trying to get over all the twists and turns of my cooking. I personally think it's pretty cool to have a mom who makes sweets for a living and says it's okay to have cookies or brownies for breakfast.
Watermelon Cucumber Sorbet with Basil
3 cups Watermelon Juice (see last entry)
1 Cucumber, medium to large
2 tbsp Lime Juice
3/4 - 1 cup Sugar
2 tsp chopped fresh Basil
Peel the cucumber, chop into chunks and either run through a juicer or puree in a food processor (then strain through a mesh sieve). This should equal around 1/3 to 1/2 cup of juice. Add to watermelon juice, then add lime juice, sugar and basil.
Put this combination in a jar with a lid and give it a really good shake to blend in the sugar. If you don't have a big enough jar, put part of the mixture in a smaller jar and shake, adding it back to the rest of the liquid. Chill in the fridge for at least an hour. Process in an ice cream maker according to directions. Freeze the sorbet in a separate container for an hour or two before serving. Allow to thaw slightly before serving. Seems counter-intuitive to freeze then thaw, but I promise, this brings out more flavor. And, the basil will have had a chance to infuse a little more.
If you don't have an ice cream maker, run, don't walk to the store and get one! No, just kidding. You can survive without one. You'll just have to do a few more steps. Pour the mixture into a shallow pan with sides, cover, and put into the freezer. Every 20 minutes, scrape the mixture with a fork to loosen. Do this until you've reached the consistency of a sorbet, although it will be more like a granita with icy pieces. It will still be just as refreshing and delicious.
As for a "vanilla" existence, I can say that particular ingredient isn't your mother's vanilla anymore. There's Tahitian vanilla, Mexican vanilla, Jamaican vanilla, Madagascar Bourbon vanilla, Small-Batch Infused vanilla...
Watermelon Cucumber Sorbet with Basil
3 cups Watermelon Juice (see last entry)
1 Cucumber, medium to large
2 tbsp Lime Juice
3/4 - 1 cup Sugar
2 tsp chopped fresh Basil
Peel the cucumber, chop into chunks and either run through a juicer or puree in a food processor (then strain through a mesh sieve). This should equal around 1/3 to 1/2 cup of juice. Add to watermelon juice, then add lime juice, sugar and basil.
Put this combination in a jar with a lid and give it a really good shake to blend in the sugar. If you don't have a big enough jar, put part of the mixture in a smaller jar and shake, adding it back to the rest of the liquid. Chill in the fridge for at least an hour. Process in an ice cream maker according to directions. Freeze the sorbet in a separate container for an hour or two before serving. Allow to thaw slightly before serving. Seems counter-intuitive to freeze then thaw, but I promise, this brings out more flavor. And, the basil will have had a chance to infuse a little more.
If you don't have an ice cream maker, run, don't walk to the store and get one! No, just kidding. You can survive without one. You'll just have to do a few more steps. Pour the mixture into a shallow pan with sides, cover, and put into the freezer. Every 20 minutes, scrape the mixture with a fork to loosen. Do this until you've reached the consistency of a sorbet, although it will be more like a granita with icy pieces. It will still be just as refreshing and delicious.
As for a "vanilla" existence, I can say that particular ingredient isn't your mother's vanilla anymore. There's Tahitian vanilla, Mexican vanilla, Jamaican vanilla, Madagascar Bourbon vanilla, Small-Batch Infused vanilla...
Sunday, July 18, 2010
Watermelon Blues
I guess, these days, I'm taking the whatever-is-on-hand approach to sweets in my kitchen. I'd love to say it's because I'm being economical and all that. But, it's because when I see fruit at this time of year, I can't seem to control how much I buy. Then, I'm left with trying to figure out how to use (read: eat) it all before it goes bad.
I bought 4 pints of blueberries from Heath Glen Organic Farm at the Mill City Farmers Market this past Saturday (actually, 5 pints - I ate one whole pint while selling shortbread at my booth). Fresh blueberries are quite the super-food, filled with anti-oxidants and vitamin C, so eating handfuls is good for you. They can also be frozen (freeze them individually by putting them on a pan in a single layer and freezing, then store them in a ziploc) and added to many treats throughout the year: smoothies, crumbles, pies, floating in champagne, you name it. Most of the blueberries were gobbled up by my family, but I had some left over in the fridge this morning. I also had half a seedless watermelon that was on its last legs, um, I mean, rind. So, to push my sorbet obsession-of-the-moment a little further, I decided to make Watermelon Blueberry Sorbet.
Watermelon Blueberry Sorbet
1/2 of a watermelon
1 cup blueberries
1/2 - 3/4 cup sugar
1 tbsp lemon or lime juice
Scrape the red flesh from the watermelon (don't lose any of the juice inside the watermelon) and put into a food processor. Pulse until smooth. You may have to do this in a few batches, since food processors have a low capacity for liquid.
Into a bowl, pour the processed watermelon through a sieve to get rid of any of the white seeds. Add the juice left behind from the scraped watermelon. Waste not; want not, right?
Puree blueberries, 1/2 cup of sugar and lemon juice until smooth and the sugar is well incorporated. Pour into a large measuring cup - I love my 8 cup measuring container.
Pour in enough watermelon juice to make 4 cups of liquid. Taste the mixture for sweetness, remembering that the freezing process mutes the sweetness. Add more sugar, if desired. Chill for at least an hour (or, if you just can't wait, put in the freezer until nice and cold). See my last blog posting (Coconut Lime Ice Cream) on how to process the sorbet in an ice cream maker.
I still have about 3 cups of watermelon juice in my fridge. And, there's a cucumber in there, too. Seems like that might be an interesting, and extremely refreshing, combination. Maybe I'll even throw in a handful of mint or basil. I'll have to see what's in my fridge, just waiting on the edge of despair.
More uses for fruit near the point of extinction in your fridge:
Last week, I had some Rainier cherries, black cap raspberries (culled from my over-grown brambles in the backyard), frozen rhubarb and one nectarine near the end of it's sweet life. So, I made jam. If you have about 1 1/2 pounds of fruit, you have the makings for jam.
Berry Rhubarb Jam
1# Berries (raspberries, blackberries, strawberries, etc.) and/or Cherries
1/3 cup water
1/2# rhubarb, chopped
1/2 - 3/4 cup sugar
Bring berries and water to a boil. Simmer until very tender. Strain into a bowl through a sieve to remove seeds, then return to pot (rinse pot to remove any leftover seeds). Add rhubarb, and any other non-berry fruit (like a nectarine), and simmer until broken down. Add sugar and cook until thick and bubbly. To test, hold spoon with jam on it at an angle - it shouldn't drip off. Also, taste for sweetness at this point. You can add a little more sugar, if you'd like. For thicker jam, use pectin as directed. Or, add 1/2 a peeled chopped apple (which contains some natural pectin) to the rhubarb berry mixture and cook until it all breaks down. Mash for a smoother jam. I pour the jam into a few small covered bowls and store in the fridge, since I know I'll eat it all within a couple of weeks. And, I haven't learned how to can, yet. That's the next lesson I'll be working on.
Labels:
basil,
berry jam,
blueberries,
cucumber,
mint,
rhubarb,
sorbet,
watermelon
Friday, July 9, 2010
Refresher Course
In the midst of the heatwave that seems to be taking over much of the country (it is the middle of summer, after all), a light, refreshing dessert is exactly what we all need. Ice cream, made with heavy cream or even whole milk, can even be a little heavy. Here is a recipe for a simple ice cream using coconut milk (perfect, if you're avoiding dairy). I hesitate to even call it "ice cream," since it doesn't contain any cream at all. It's nearly a sorbet or ice milk. No matter what you call it, it's the perfect follow-up to Thai food, BBQ, or burgers.
This is best prepared with an ice cream maker (I have a Krups ice cream maker, but Cuisinart's ice cream maker has a good reputation, too). I store the canister in my freezer at all time, just in case I get a craving for ice cream. Double check the manufacturer's recommendation for maximum liquid amount, since it will expand during the freezing process. The mixture should also be a little on the sweeter side, since freezing subdues the sweetness. One more thing. This ice cream really develops the best flavor if frozen further after being processed in the ice cream maker. So, this could be a 3 day process, although each step may take only a few moments.
Coconut Lime Ice Cream
2 cans (3 cups) Coconut Milk (Thai Kitchen makes an all natural one)
3-4 long Lime Zest Strips
3/4 cup Sugar
Lime Juice (for less tang, only 1-2 Tbsp)
Water
1 Tbsp Rose or Orange Flower Water, if desired
The day before making the ice cream, prepare the liquid. In a saucepan, warm the coconut milk, lime zest and sugar, until the sugar is dissolved. Taste for sweetness and add a little more sugar, if necessary. Remove from heat. In a one-cup measuring cup, add the lime juice and enough water to make one cup of liquid. The more lime juice added, the tangier the ice cream. Add lime juice and water. Strain mixture into a container, cover, and chill for at least 2-3 hours. The freezer canister should freeze for a minimum of 10 hours, or according to the manufacturer's directions.
To make the ice cream, remove the prepared liquid from the refrigerator and add the rose or orange flower water, if desired. Assemble the ice cream maker, turn it on, and pour in the liquid. Leave the machine on until the mixture reaches the desired consistency (20-40 minutes). It will be a little on the soft side. For best results, pour the ice cream into a freezable container and freeze until hard.
To serve, allow to thaw a little, stir until smooth, and spoon into serving bowls.
I brought some of this to my neighbors, and of course, we came up with a way to use this for a cocktail. In a blender, pour one shot of rum, a few scoops of Coconut Lime Ice Cream, and some ice. Blend and serve with a wedge of lime. A perfect Limon Colada.
It would be easy to come up with a handful of variations on this ice cream, too. Toasted pistachios and lime zest. Make the base recipe without the lime zest and juice, and add orange zest and juice or pineapple juice (there's your Pina Colada!). Add 1/4 cup grated coconut. Roughly chopped dark chocolate. Give me some time, I'll come up with more. I'm sure I'll be working on ideas for the next few days, while I eat a few bowls of Coconut Lime Ice Cream. I'm not even going to wait to have this after a nice meal. It just might BE the meal.
Saturday, July 3, 2010
As American As....A Berry Tart?
I know nothing is more American than apple pie, but local apples just aren't in season here in Minnesota for the 4th of July. And, they aren't even the right colors - red, white and blue. Maybe the red and the white, but I've never seen a blue apple. And, Americans like their food to match their patriotism and red and black raspberries, strawberries, and blueberries fit the right color palette for the holiday. Besides, they are just now in season here.
I ran into the first pints of blueberries today at the Mill City Farmers Market, in Minneapolis by the Guthrie Theater and the Mill City Museum. I also bought a quart of strawberries, with a scent so strong, I could smell them across the plaza while I set up my booth, where I sell shortbread, scones and caramels based on family recipes. It also helps to have generous neighbors for friends - I raided their large raspberry and black cap raspberry bushes to fill out the tart. Then, using some of the lemon zest shortbread for the crust, I made a perfectly patriotic tart to share with family and friends. Or, to eat for breakfast before any festivities even start. I'll have to sweep the crumbs up to hide the evidence.
Fresh Berry Tart with Lemon Shortbread Crust
8 Bramblewood Lemon Shortbread Cookies, crushed
3-4 c. Berries (blueberries, raspberries, strawberries, etc.), washed, picked over and stemmed if necessary½ c. Sugar
¼ c. Cornstarch
½ tsp. Fresh Thyme or minced Basil, if desired
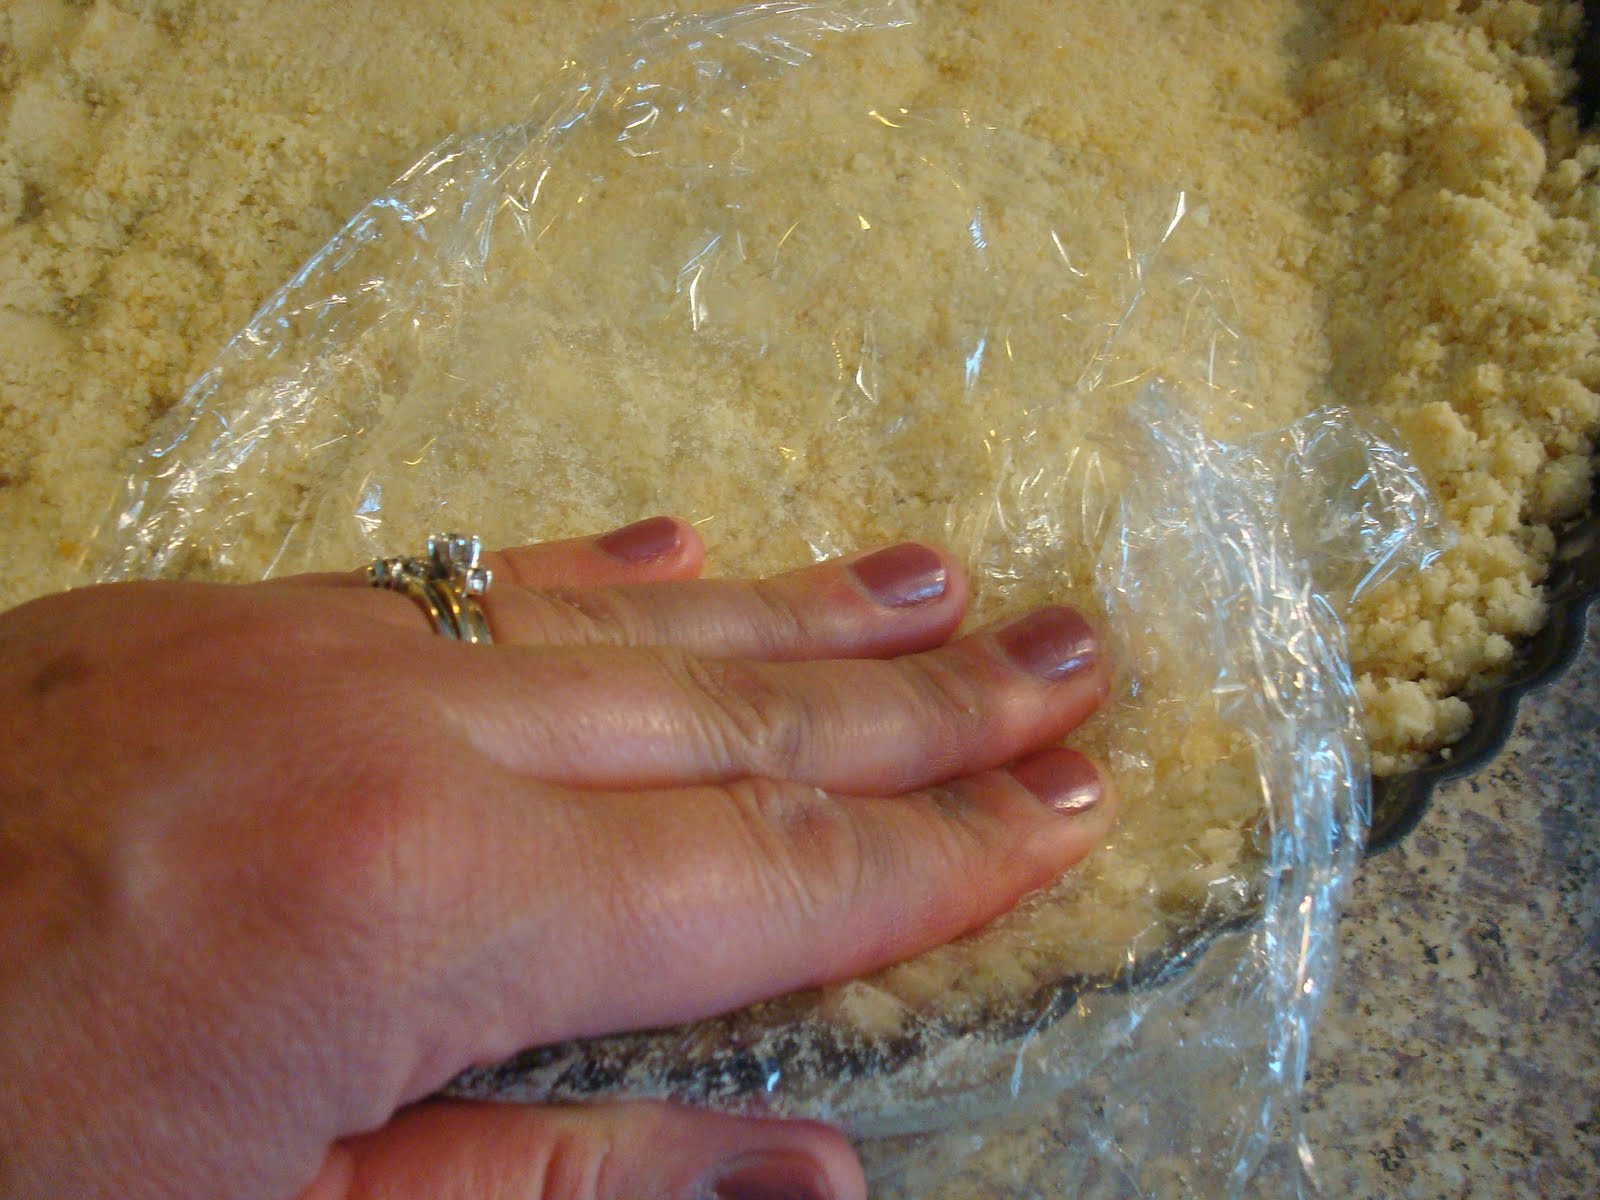
Set oven to 350 degrees. Finely crush shortbread cookies and, with cling wrap to keep crumbs from sticking to your hands, firmly press into a lightly buttered 8-9” tart pan. Chill until needed.
Bake for about 30 minutes, or until the berries are bubbly. Cool, then serve at room temperature or warmed, with fresh whipped cream or ice cream. You may also chill and serve.
No matter what, this tart is sure to get plenty of "ooh"s and "ah"s, which is always good to practice before the rocket's red glare lights up the night.
Thursday, June 10, 2010
Banana Bliss
I often buy lots of bananas with the idea that some of them will get too ripe for my daily peanut butter and banana toasted sandwiches. My version of ripe may not be everyone else's. I declare them "too ripe" as soon as I can smell them from 3 feet away, with slight brown spots. For some, this is the sign of a nearly perfect banana. I just can't take the "squish" of a well-ripened banana. So, at this point, I freeze them (sans peels, in a ziploc with most of the air squeezed out) to use at a later date, if I just can't turn the oven on at that moment, which means I must be pretty busy.
When I was pregnant with my daughter, besides the above PB&B sandwich, one of my cravings was a good, fruit filled smoothie - not the sherbet, wheat grass, protein powdered smoothie offered at a shop, but one truly based on fruit. I'd use frozen bananas, strawberries, blueberries, mangoes, and any other fruit on hand. Again, as the fresh fruit headed towards the overripe stage, I'd wash them, spread them out on a pan, freeze, and keep in a ziploc in the freezer. I'd also add yogurt to my smoothie and some juice, or even milk, to up the calcium intake. Not too sweet, but oh-so-satisfying.
My favorite use, though, for ripe bananas is Banana Bread. I've been faithful to the same recipe for years, always hoping the result would be different than the perfect on the top, overdone on the bottom, loaf I got every time. I'd tried Mark Bittman's recipe from How to Cook Everything (usually my main man in the kitchen), but the loaf was too bread-y, not banana-y enough for my taste. So, I pulled out the well-used copy of The New York Times Cookbook, by Craig Claiborne, my parents were done with and gave to me a few years ago (I have the 1961 version). The recipe is nearly the same as my old, not-so-faithful recipe from Better Homes and Gardens Cookbook that I've been trying to make work all these years. The big difference, I think, is the order in which the ingredients are put together. And, of course, I had to add something else. Coconut being my main obsession, that's what I added.
Banana Bread with Toasted Coconut
1 3/4 c. Flour 2/3 c. sugar
2 tsp Baking Powder 2 large eggs
1/4 tsp baking soda 3 mashed ripe bananas (I like more than a cup's worth)
1/2 tsp salt 2 tsp. almond extract
1/3 c. salted butter 1 c. coconut flakes
Preheat oven to 350 degrees. Butter loaf pan, but not all the way up the sides (this will keep high edges from forming), and set aside.
In a bowl, whisk together flour, baking powder, baking soda and salt. In a non-stick pan, lightly toast the coconut (do not brown). Immediately pour the coconut onto a plate and cool in the fridge.

When I was pregnant with my daughter, besides the above PB&B sandwich, one of my cravings was a good, fruit filled smoothie - not the sherbet, wheat grass, protein powdered smoothie offered at a shop, but one truly based on fruit. I'd use frozen bananas, strawberries, blueberries, mangoes, and any other fruit on hand. Again, as the fresh fruit headed towards the overripe stage, I'd wash them, spread them out on a pan, freeze, and keep in a ziploc in the freezer. I'd also add yogurt to my smoothie and some juice, or even milk, to up the calcium intake. Not too sweet, but oh-so-satisfying.
My favorite use, though, for ripe bananas is Banana Bread. I've been faithful to the same recipe for years, always hoping the result would be different than the perfect on the top, overdone on the bottom, loaf I got every time. I'd tried Mark Bittman's recipe from How to Cook Everything (usually my main man in the kitchen), but the loaf was too bread-y, not banana-y enough for my taste. So, I pulled out the well-used copy of The New York Times Cookbook, by Craig Claiborne, my parents were done with and gave to me a few years ago (I have the 1961 version). The recipe is nearly the same as my old, not-so-faithful recipe from Better Homes and Gardens Cookbook that I've been trying to make work all these years. The big difference, I think, is the order in which the ingredients are put together. And, of course, I had to add something else. Coconut being my main obsession, that's what I added.
Banana Bread with Toasted Coconut
1 3/4 c. Flour 2/3 c. sugar
2 tsp Baking Powder 2 large eggs
1/4 tsp baking soda 3 mashed ripe bananas (I like more than a cup's worth)
1/2 tsp salt 2 tsp. almond extract
1/3 c. salted butter 1 c. coconut flakes
Preheat oven to 350 degrees. Butter loaf pan, but not all the way up the sides (this will keep high edges from forming), and set aside.
In a bowl, whisk together flour, baking powder, baking soda and salt. In a non-stick pan, lightly toast the coconut (do not brown). Immediately pour the coconut onto a plate and cool in the fridge.

In a mixing bowl, cream the butter and sugar. Beat the eggs together, then add to the butter and sugar. Really let these mix together well. Add almond extract. Add the flour mixture alternately with the mashed bananas, mixing well after each addition, until smooth. Mix in 3/4 of the coconut flakes. Pour into prepared loaf pan and top with remaining coconut flakes.
Bake for 1 hour, then check for doneness - insert a toothpick or thin knife blade in the center. It should come out clean. I usually pull the loaf out as soon as there is very little moisture on the blade, since I don't like my banana bread dry. Allow to cool in the pan for a few minutes, then take the loaf out of the pan and cool on a rack.
At this point, I can't wait for the bread to cool completely, and I slice off a piece and slather it with butter. Quality control, at it's best. Store the bread wrapped tight in plastic, on the counter for a couple of days. Or, in addition to the plastic wrap, put the loaf in a ziploc bag, and freeze. I also like to toast a slice of the banana bread in my toaster oven (a plunger-style toaster doesn't work, since the bread can break apart too easily) for an afternoon snack with my 3 o'clock cup of tea. And, it's perfect for breakfast. Okay, I could eat a slice an hour and not get tired of it. There's never enough to share, so, I'm sorry, sweet co-workers, I will not be bringing any banana bread in for you today. You'll just have to bake your own loaf.
Saturday, May 29, 2010
Variations on a Theme
One of the most satisfying, mom-put-this-in-my-lunchbox cookies to make is the chocolate chip cookie. It tastes great right out of the oven, a few days later, dipped in milk, straight from the freezer, or with ice cream sandwiched in between two cookies. We all have our favorite versions, to which many are steadfast and true. Mine has always been the Original Toll House recipe (click here for a Wikipedia article about the creation of the recipe), but, of course, I have created my own variations over the years.
Malted Chocolate Chip Cookies
4 ½ cups flour 1 cup granulated sugar
2 tsp baking soda 2 cups packed brown sugar
2 tsp salt 2 tsp vanilla2 cups (4 sticks) 4 large eggs
salted butter
¾ cup malted milk 2-4 cups chocolate chips
With a whisk, combine flour, baking soda, salt and malted milk in a small bowl. Set aside. In a large mixer bowl, beat softened (but not melted) butter, sugars, and vanilla until creamy. Add eggs, one at a time, until well combined. Add flour mixture 1 cup at a time, until well combined. Stir in chocolate chips.
Pre-heat oven to 375 degrees. Using a small ice cream scoop, place cookie dough on a parchment lined baking sheet. At this point, I bake off a few cookies as a reward for all my hard work (9-12 minutes). But, the rest I scoop out onto a parchment lined baking sheet, then put in the freezer to be baked off in smaller batches. This also aids in making them better cookies. They’re a little more dense, but still very chewy. You can even refrigerate the dough overnight to develop this density.
Another variation I love to make is a play on the whole sweet-salty thing (what my friend, Stephanie, calls yin yang cooking). I make the chocolate chip cookies without the malted milk and, instead of plain salt, I use the Smoky Chocolate Salt from Golden Fig. This is an amazing, hand-blended salt with sea salt, Alderwood smoked sea salt, vanilla and cocoa. I also sprinkle a little of the salt on top of the cookie before baking. You can also use coarsely ground salt, instead of the Smoky Chocolate Salt.
Sometimes, I have this blasphemous urge to make the chocolate chips smaller, or get rid of them altogether. Strike me down now, oh Lord of the Chocolate Chip Cookies. For the salted cookies, I actually coarsely grind the chips before adding them. This results in a very nice, gesamtkunstwerk experience. (I can't believe I actually used "gesamtkunstwerk" to describe a cookie. It's a term used by Richard Wagner, the 19th century composer, and refers to a performance which includes all the arts - music, dance, painting, literature - all on equal footing. So, instead of the chocolate chips stealing the show, you get a lovely balance of flavors. Who said I would never use my master's degree. So much for telling Sallie Mae I'm not using it - now I'll have to pay my loan.)
Then there's the kitchen sink approach to chocolate chip cookies. I found this one on the Quaker Oats lid and made my customary changes to the recipe.
Chewy Choc-Oat-Chip Cookies
1 cup (2 sticks) salted butter 1 3/4 cup flour
1 1/4 cup packed brown sugar 1 tsp baking soda
1/2 cup granulated sugar 1/2 tsp salt
2 large eggs 2 1/2 cups uncooked oats
2 tbsp milk 2 cups (12 oz) chocolate chips
2 tsp vanilla 1 cup chopped, toasted pecans
1 cup coconut
1 cup raisins, craisins, or other dried fruit
Heat oven to 375 degrees. Combine flour, baking soda and salt; set aside. In a mixing bowl, beat together butter, and sugars until creamy. Add eggs, milk and vanilla and beat well. Stir in oats, chocolate chips, pecans, coconut and dried fruit. Using a small ice cream scoop, place on a parchment lined pan and bake for 9-10 minutes.
___________________________________
Now, pour yourself a large glass of cold milk, dunk all the cookies you want (hey, we're grown-ups and can have cookies and milk for dinner, if we so choose) and listen to the Ride of the Valkries. Even Richard Wagner couldn't deny the culinary arts in his gesamtkunstwerk list.
Subscribe to:
Posts (Atom)