Friday, July 9, 2010

Refresher Course


In the midst of the heatwave that seems to be taking over much of the country (it is the middle of summer, after all), a light, refreshing dessert is exactly what we all need. Ice cream, made with heavy cream or even whole milk, can even be a little heavy. Here is a recipe for a simple ice cream using coconut milk (perfect, if you're avoiding dairy). I hesitate to even call it "ice cream," since it doesn't contain any cream at all. It's nearly a sorbet or ice milk. No matter what you call it, it's the perfect follow-up to Thai food, BBQ, or burgers.

This is best prepared with an ice cream maker (I have a Krups ice cream maker, but Cuisinart's ice cream maker has a good reputation, too). I store the canister in my freezer at all time, just in case I get a craving for ice cream. Double check the manufacturer's recommendation for maximum liquid amount, since it will expand during the freezing process. The mixture should also be a little on the sweeter side, since freezing subdues the sweetness. One more thing. This ice cream really develops the best flavor if frozen further after being processed in the ice cream maker. So, this could be a 3 day process, although each step may take only a few moments.

Coconut Lime Ice Cream
2 cans (3 cups) Coconut Milk (Thai Kitchen makes an all natural one)
3-4 long Lime Zest Strips
3/4 cup Sugar
Lime Juice (for less tang, only 1-2 Tbsp)
Water
1 Tbsp Rose or Orange Flower Water, if desired

The day before making the ice cream, prepare the liquid. In a saucepan, warm the coconut milk, lime zest and sugar, until the sugar is dissolved. Taste for sweetness and add a little more sugar, if necessary. Remove from heat. In a one-cup measuring cup, add the lime juice and enough water to make one cup of liquid. The more lime juice added, the tangier the ice cream. Add lime juice and water. Strain mixture into a container, cover, and chill for at least 2-3 hours. The freezer canister should freeze for a minimum of 10 hours, or according to the manufacturer's directions.

To make the ice cream, remove the prepared liquid from the refrigerator and add the rose or orange flower water, if desired. Assemble the ice cream maker, turn it on, and pour in the liquid. Leave the machine on until the mixture reaches the desired consistency (20-40 minutes). It will be a little on the soft side. For best results, pour the ice cream into a freezable container and freeze until hard.

To serve, allow to thaw a little, stir until smooth, and spoon into serving bowls.

I brought some of this to my neighbors, and of course, we came up with a way to use this for a cocktail. In a blender, pour one shot of rum, a few scoops of Coconut Lime Ice Cream, and some ice. Blend and serve with a wedge of lime. A perfect Limon Colada.

It would be easy to come up with a handful of variations on this ice cream, too. Toasted pistachios and lime zest. Make the base recipe without the lime zest and juice, and add orange zest and juice or pineapple juice (there's your Pina Colada!). Add 1/4 cup grated coconut. Roughly chopped dark chocolate. Give me some time, I'll come up with more. I'm sure I'll be working on ideas for the next few days, while I eat a few bowls of Coconut Lime Ice Cream. I'm not even going to wait to have this after a nice meal. It just might BE the meal.

Saturday, July 3, 2010

As American As....A Berry Tart?


I know nothing is more American than apple pie, but local apples just aren't in season here in Minnesota for the 4th of July. And, they aren't even the right colors - red, white and blue. Maybe the red and the white, but I've never seen a blue apple. And, Americans like their food to match their patriotism and red and black raspberries, strawberries, and blueberries fit the right color palette for the holiday. Besides, they are just now in season here.


I ran into the first pints of blueberries today at the Mill City Farmers Market, in Minneapolis by the Guthrie Theater and the Mill City Museum. I also bought a quart of strawberries, with a scent so strong, I could smell them across the plaza while I set up my booth, where I sell shortbread, scones and caramels based on family recipes. It also helps to have generous neighbors for friends - I raided their large raspberry and black cap raspberry bushes to fill out the tart. Then, using some of the lemon zest shortbread for the crust, I made a perfectly patriotic tart to share with family and friends. Or, to eat for breakfast before any festivities even start. I'll have to sweep the crumbs up to hide the evidence.


Fresh Berry Tart with Lemon Shortbread Crust


8 Bramblewood Lemon Shortbread Cookies, crushed
3-4 c. Berries (blueberries, raspberries, strawberries, etc.), washed, picked over and stemmed if necessary
½ c. Sugar
¼ c. Cornstarch
½ tsp. Fresh Thyme or minced Basil, if desired


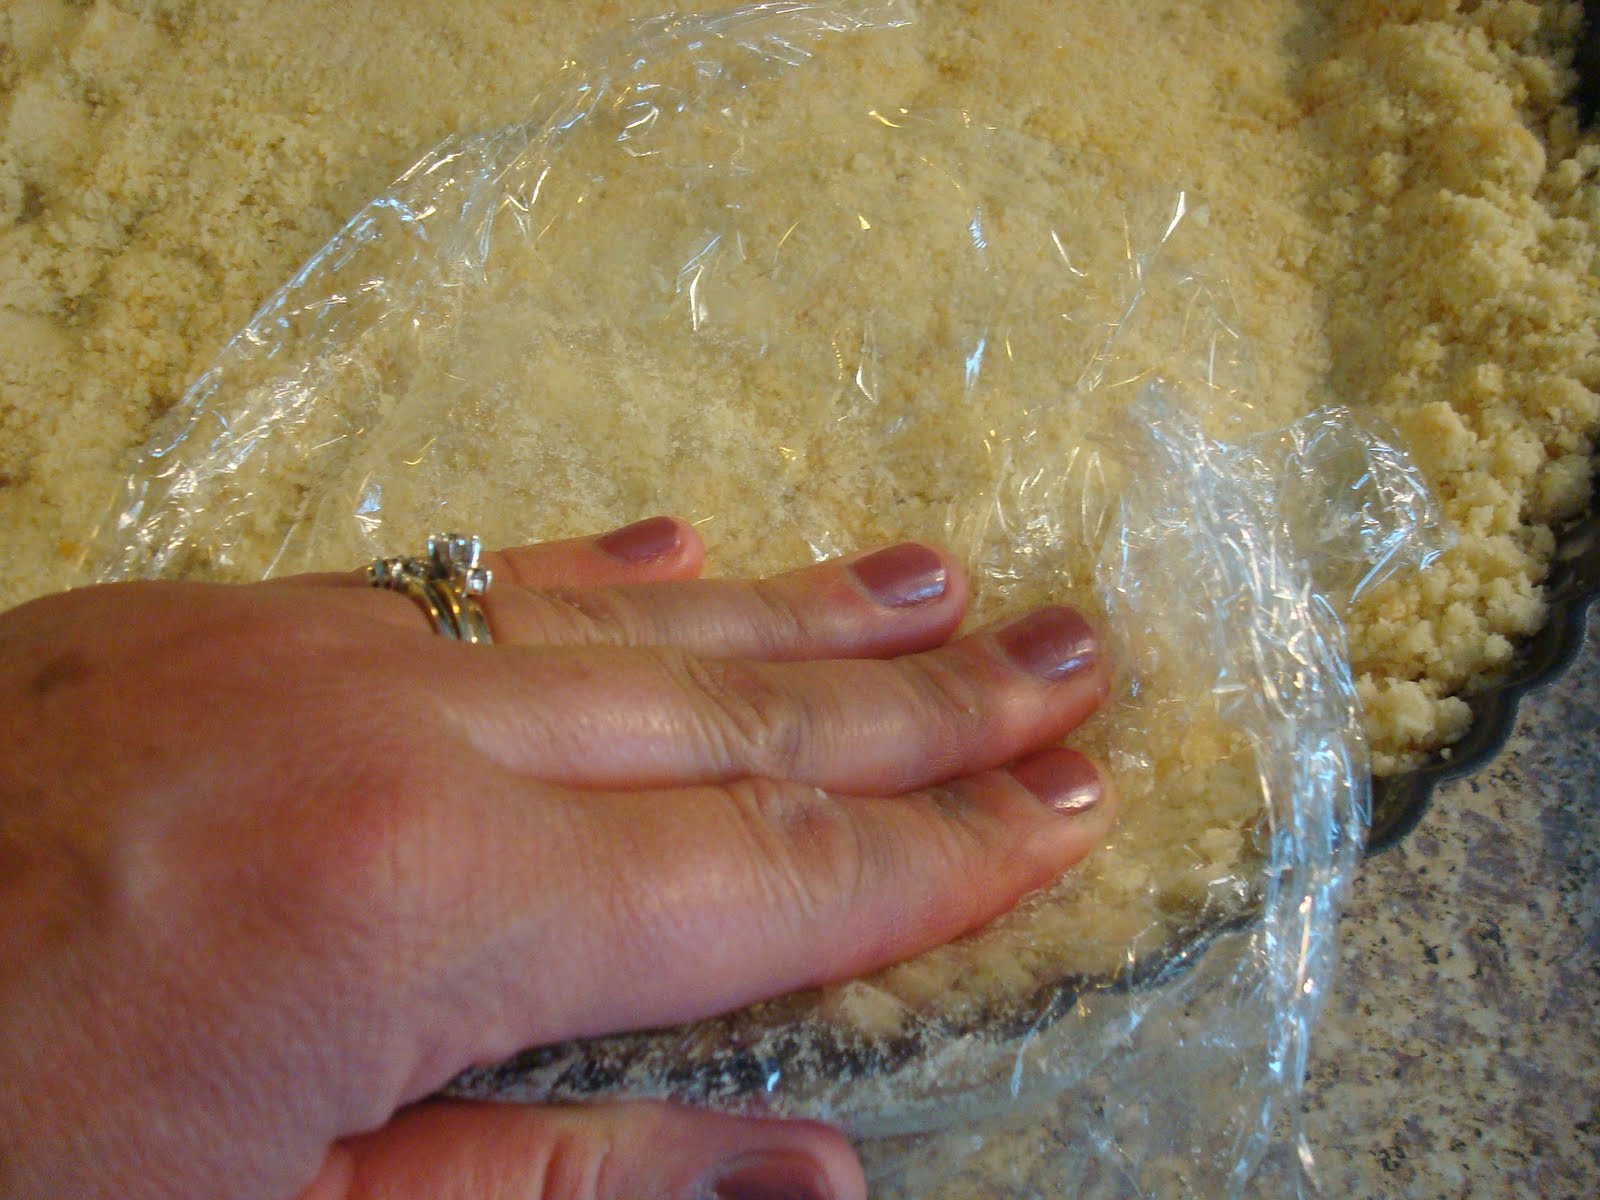
Set oven to 350 degrees. Finely crush shortbread cookies and, with cling wrap to keep crumbs from sticking to your hands, firmly press into a lightly buttered 8-9” tart pan. Chill until needed.


Combine sugar and cornstarch, then toss with all but one cup of the berries. Add fresh thyme or basil, if desired. Pour into prepared crust, then place the remaining berries on top.


Bake for about 30 minutes, or until the berries are bubbly. Cool, then serve at room temperature or warmed, with fresh whipped cream or ice cream. You may also chill and serve.


If you don't have access to Bramblewood's Lemon Zest Shortbread (in which case, email me to place an order, amy@bramblewoodtreats.com), you can certainly use crushed shortbread cookies from another, unnamed company, mixed with 2 tbsp. melted butter and 1 tbsp fresh lemon zest, or make your own tart crust, such as the Rich Tart Crust from Mark Bittman's "How to Cook Everything" (Macmillan, 1998) or the Easy Tart Crust from Bon Appetit, as seen on epicurious.com:  http://www.epicurious.com/recipes/food/views/Easy-Tart-Crust-109282.


No matter what, this tart is sure to get plenty of "ooh"s and "ah"s, which is always good to practice before the rocket's red glare lights up the night.


Thursday, June 10, 2010

Banana Bliss

I often buy lots of bananas with the idea that some of them will get too ripe for my daily peanut butter and banana toasted sandwiches. My version of ripe may not be everyone else's. I declare them "too ripe" as soon as I can smell them from 3 feet away, with slight brown spots. For some, this is the sign of a nearly perfect banana. I just can't take the "squish" of a well-ripened banana. So, at this point, I freeze them (sans peels, in a ziploc with most of the air squeezed out) to use at a later date, if I just can't turn the oven on at that moment, which means I must be pretty busy.

When I was pregnant with my daughter, besides the above PB&B sandwich, one of my cravings was a good, fruit filled smoothie - not the sherbet, wheat grass, protein powdered smoothie offered at a shop, but one truly based on fruit. I'd use frozen bananas, strawberries, blueberries, mangoes, and any other fruit on hand. Again, as the fresh fruit headed towards the overripe stage, I'd wash them, spread them out on a pan, freeze, and keep in a ziploc in the freezer. I'd also add yogurt to my smoothie and some juice, or even milk, to up the calcium intake. Not too sweet, but oh-so-satisfying.

My favorite use, though, for ripe bananas is Banana Bread. I've been faithful to the same recipe for years, always hoping the result would be different than the perfect on the top, overdone on the bottom, loaf I got every time. I'd tried Mark Bittman's recipe from How to Cook Everything (usually my main man in the kitchen), but the loaf was too bread-y, not banana-y enough for my taste. So, I pulled out the well-used copy of The New York Times Cookbook, by Craig Claiborne, my parents were done with and gave to me a few years ago (I have the 1961 version). The recipe is nearly the same as my old, not-so-faithful recipe from Better Homes and Gardens Cookbook that I've been trying to make work all these years. The big difference, I think, is the order in which the ingredients are put together. And, of course, I had to add something else. Coconut being my main obsession, that's what I added.

Banana Bread with Toasted Coconut
1 3/4 c. Flour                      2/3 c. sugar
2 tsp Baking Powder          2 large eggs
1/4 tsp baking soda            3 mashed ripe bananas (I like more than a cup's worth)
1/2 tsp salt                         2 tsp. almond extract
1/3 c. salted butter             1 c. coconut flakes

Preheat oven to 350 degrees. Butter loaf pan, but not all the way up the sides (this will keep high edges from forming), and set aside.
In a bowl, whisk together flour, baking powder, baking soda and salt. In a non-stick pan, lightly toast the coconut (do not brown). Immediately pour the coconut onto a plate and cool in the fridge.


In a mixing bowl, cream the butter and sugar. Beat the eggs together, then add to the butter and sugar. Really let these mix together well. Add almond extract. Add the flour mixture alternately with the mashed bananas, mixing well after each addition, until smooth. Mix in 3/4 of the coconut flakes. Pour into prepared loaf pan and top with remaining coconut flakes.

Bake for 1 hour, then check for doneness - insert a toothpick or thin knife blade in the center. It should come out clean. I usually pull the loaf out as soon as there is very little moisture on the blade, since I don't like my banana bread dry. Allow to cool in the pan for a few minutes, then take the loaf out of the pan and cool on a rack.

At this point, I can't wait for the bread to cool completely, and I slice off a piece and slather it with butter. Quality control, at it's best. Store the bread wrapped tight in plastic, on the counter for a couple of days. Or, in addition to the plastic wrap, put the loaf in a ziploc bag, and freeze. I also like to toast a slice of the banana bread in my toaster oven (a plunger-style toaster doesn't work, since the bread can break apart too easily) for an afternoon snack with my 3 o'clock cup of tea. And, it's perfect for breakfast. Okay, I could eat a slice an hour and not get tired of it. There's never enough to share, so, I'm sorry, sweet co-workers, I will not be bringing any banana bread in for you today. You'll just have to bake your own loaf.


Saturday, May 29, 2010

Variations on a Theme


One of the most satisfying, mom-put-this-in-my-lunchbox cookies to make is the chocolate chip cookie. It tastes great right out of the oven, a few days later, dipped in milk, straight from the freezer, or with ice cream sandwiched in between two cookies. We all have our favorite versions, to which many are steadfast and true. Mine has always been the Original Toll House recipe (click here for a Wikipedia article about the creation of the recipe), but, of course, I have created my own variations over the years.
Malted Chocolate Chip Cookies
  
4 ½ cups flour                1 cup granulated sugar
2 tsp baking soda           2 cups packed brown sugar
2 tsp salt                           2 tsp vanilla
2 cups (4 sticks)             4 large eggs
salted butter
¾ cup malted milk       2-4 cups chocolate chips

With a whisk, combine flour, baking soda, salt and malted milk in a small bowl. Set aside. In a large mixer bowl, beat softened (but not melted) butter, sugars, and vanilla until creamy. Add eggs, one at a time, until well combined. Add flour mixture 1 cup at a time, until well combined. Stir in chocolate chips.

Pre-heat oven to 375 degrees. Using a small ice cream scoop, place cookie dough on a parchment lined baking sheet. At this point, I bake off a few cookies as a reward for all my hard work (9-12 minutes). But, the rest I scoop out onto a parchment lined baking sheet, then put in the freezer to be baked off in smaller batches. This also aids in making them better cookies. They’re a little more dense, but still very chewy. You can even refrigerate the dough overnight to develop this density.


Sweet & Salty Chocolate Chip Cookies
 
Another variation I love to make is a play on the whole sweet-salty thing (what my friend, Stephanie, calls yin yang cooking). I make the chocolate chip cookies without the malted milk and, instead of plain salt, I use the Smoky Chocolate Salt from Golden Fig. This is an amazing, hand-blended salt with sea salt, Alderwood smoked sea salt, vanilla and cocoa. I also sprinkle a little of the salt on top of the cookie before baking. You can also use coarsely ground salt, instead of the Smoky Chocolate Salt.
 
Sometimes, I have this blasphemous urge to make the chocolate chips smaller, or get rid of them altogether. Strike me down now, oh Lord of the Chocolate Chip Cookies. For the salted cookies, I actually coarsely grind the chips before adding them. This results in a very nice, gesamtkunstwerk experience. (I can't believe I actually used "gesamtkunstwerk" to describe a cookie. It's a term used by Richard Wagner, the 19th century composer, and refers to a performance which includes all the arts - music, dance, painting, literature - all on equal footing. So, instead of the chocolate chips stealing the show, you get a lovely balance of flavors. Who said I would never use my master's degree. So much for telling Sallie Mae I'm not using it - now I'll have to pay my loan.)
 
Then there's the kitchen sink approach to chocolate chip cookies. I found this one on the Quaker Oats lid and made my customary changes to the recipe.
 
Chewy Choc-Oat-Chip Cookies
 
1 cup (2 sticks) salted butter             1 3/4 cup flour                                                                 
1 1/4 cup packed brown sugar          1 tsp baking soda
1/2 cup granulated sugar                  1/2 tsp salt
2 large eggs                                       2 1/2 cups uncooked oats
2 tbsp milk                                       2 cups (12 oz) chocolate chips
2 tsp vanilla                                      1 cup chopped, toasted pecans
                                                          1 cup coconut
                                                         1 cup raisins, craisins, or other dried fruit
 
Heat oven to 375 degrees. Combine flour, baking soda and salt; set aside. In a mixing bowl, beat together butter,  and sugars until creamy. Add eggs, milk and vanilla and beat well. Stir in oats, chocolate chips, pecans, coconut and dried fruit. Using a small ice cream scoop, place on a parchment lined pan and bake for 9-10 minutes.
 
___________________________________
 
Now, pour yourself a large glass of cold milk, dunk all the cookies you want (hey, we're grown-ups and can have cookies and milk for dinner, if we so choose) and listen to the Ride of the Valkries. Even Richard Wagner couldn't deny the culinary arts in his gesamtkunstwerk list.
 

Saturday, May 1, 2010

Tastes Like Nostalgia

There's a cookie that I really loved as a little girl in sunny California that had disappeared. I couldn't remember the name of the cookie or the brand, although I could see it in my mind's eye (which is so frustrating - isn't there a print button in the brain?). I knew the cookie had raisins in it and it wasn't super sweet. Then, one Christmas about 5 years ago, my mom tucked a package of Garibaldi Biscuits in my stocking. Now, stockings at Mom's house are a thing of beauty. My family has even talked about foregoing the main gifts in favor of the stockings, but who wants to give up a brand new Cuisinart Food Prep, my big gift this year. I certainly don't. Back to the cookie. I took one bite and I was suddenly 5-years-old again, standing in the kitchen of our apartment in San Diego. Total taste trip!


Smells and tastes are so connected with events and times in our lives, that they can transport us right back to a nearly lost memory. The same thing happened when I had fig jam at the Fancy Food Show in San Francisco a few years ago. I was there with my cousin, who I hadn't seen in several years, and took a taste of Dalmatia Fig Jam. I looked at my cousin and said, "Why do I know that taste?" She said, "Because, Great-Grandma Park used to make jam with the figs from the tree in her back yard." It was a memory I had completely forgotten. There it was, handed to me on a cracker.


I went searching for a recipe for the Garibaldi Biscuits, since I wasn't going to order them from the Vermont Country Store every time I wanted them (as tempting as it might be). On Google, I found a simple recipe, albeit in metric (European) measurements, which is simple to convert. Just use one of the systems, also found on Google, to make the conversion. I discovered that the raisins were actually currants, which is a like a raisin, but much smaller. There are red currents, which are completely different, so don't use those. You'll find them at the grocery store as Zante currents. I like to say that they're intense raisins, without the squish.

The Garibaldi Biscuits aren't too difficult to make. The dough is a little sticky, so I've come up with a few ways that make it easier to handle, besides just throwing it out and buying them online.

Garibaldi Biscuits
1 cup flour
1/4 cup sugar
pinch of salt
4 tbsp cold butter (I prefer salted)
1/4 cup milk
1/2 cup currants (Zante)

Combine flour, sugar and salt. Cut in butter, or use food processor (my preferred method) until crumbly. Add milk and pulse until the dough starts to gather on the blade. Turn out onto a well floured surface. Press together until a ball forms, wrap in plastic wrap and flatten out into a rectangle shape. Chill.

Finely chop the currants - again, I prefer using the food processor (and, no, it isn't because it's all shiny and new). If you're using a knife, you may want to put a little vegetable oil on it to keep the currants from sticking. Roll the chilled dough out in a long rectangle on a sheet of floured parchment paper until it is the length of the paper (which should be the length of a standard jelly roll pan). Spread the currants down the middle of the dough (think of the dough as divided into 3 long rows and put the currants in the middle row). They won't necessarily cover all of the area since it isn't a thick amount of filling. Fold one half of the dough toward the middle, using the parchment to hold the dough (see, I told you I'd help you handle the sticky dough), then do the same with the other side. Cut this in half to create two shorter pieces. Carefully put both pieces side by side, cover with another piece of parchment, and roll them out until they're a little thinner. Flip them over so that the edge is on the bottom. Place the biscuits and parchment on the baking sheet. Brush with an egg wash or milk and sprinkle with sugar.

Bake at 375 degrees until golden brown, about 15-25 minutes, depending on your oven. Remove from oven and immediately cut into 1 inch pieces.

A favorite variation of mine is to use apricots and craisins, instead of currants. Use 1/4 cup of apricots and 1/4 cup of craisins. Pulse in the food processor just like the currants until finely chopped, and spread on the dough.

These make beautiful cookies for the holiday season, but I love them year 'round. They're a great breakfast cookie, too. Well, I'll eat any cookie for breakfast. At least I know what the ingredients are, as opposed to breakfast bars or cereal from the grocery store.


Fig Jam
I found a recipe for Fig Jam using dried figs that tastes a lot like the jam Grandma Park used to make. I can't wait for fresh figs to come in to my local co-op, but until then, I'll have to be satisfied with using dried figs. You can find them at any grocery store - even Sun-Maid has them. Black Mission figs are the most common.

Fig Jam
7 oz. dried figs
1 1/4 cup water
2 Tbsp lemon juice
3/4 cup sugar

Place figs in a pan, cover with water and bring to a boil. Remove from heat and allow to soak for at least an hour. After the figs have softened and plumped up, remove them from the pan, but save the water. Place the pan back on the stove, add the lemon juice and sugar and bring to a second boil. Reduce heat and simmer for 5-10 minutes. In the meantime, snip the stems off the figs and chop them with a knife or in a food processor. I like a smooth fig jam, so I chop them until there are no pieces left. Add the chopped figs to the pan, stir thoroughly, and bring to another boil (be careful, this thick mixture can burn if it splatters onto your skin - use a cover). Reduce heat and simmer for 15-20 minutes until thickened. If you understand how to can, you can do that. I don't have a well-stocked shelf in my basement with the bounty from my non-existent garden, so obviously, I don't know how to can. I pour the mixture in a few covered bowls and keep them in my fridge. It doesn't take long to use it up since it goes on my toast every morning.

This would be a delicious filling for the Garibaldi Biscuits. Then, you can take Fig Newtons off your shopping list.


Friday, April 23, 2010

Gigantic Marshmallows

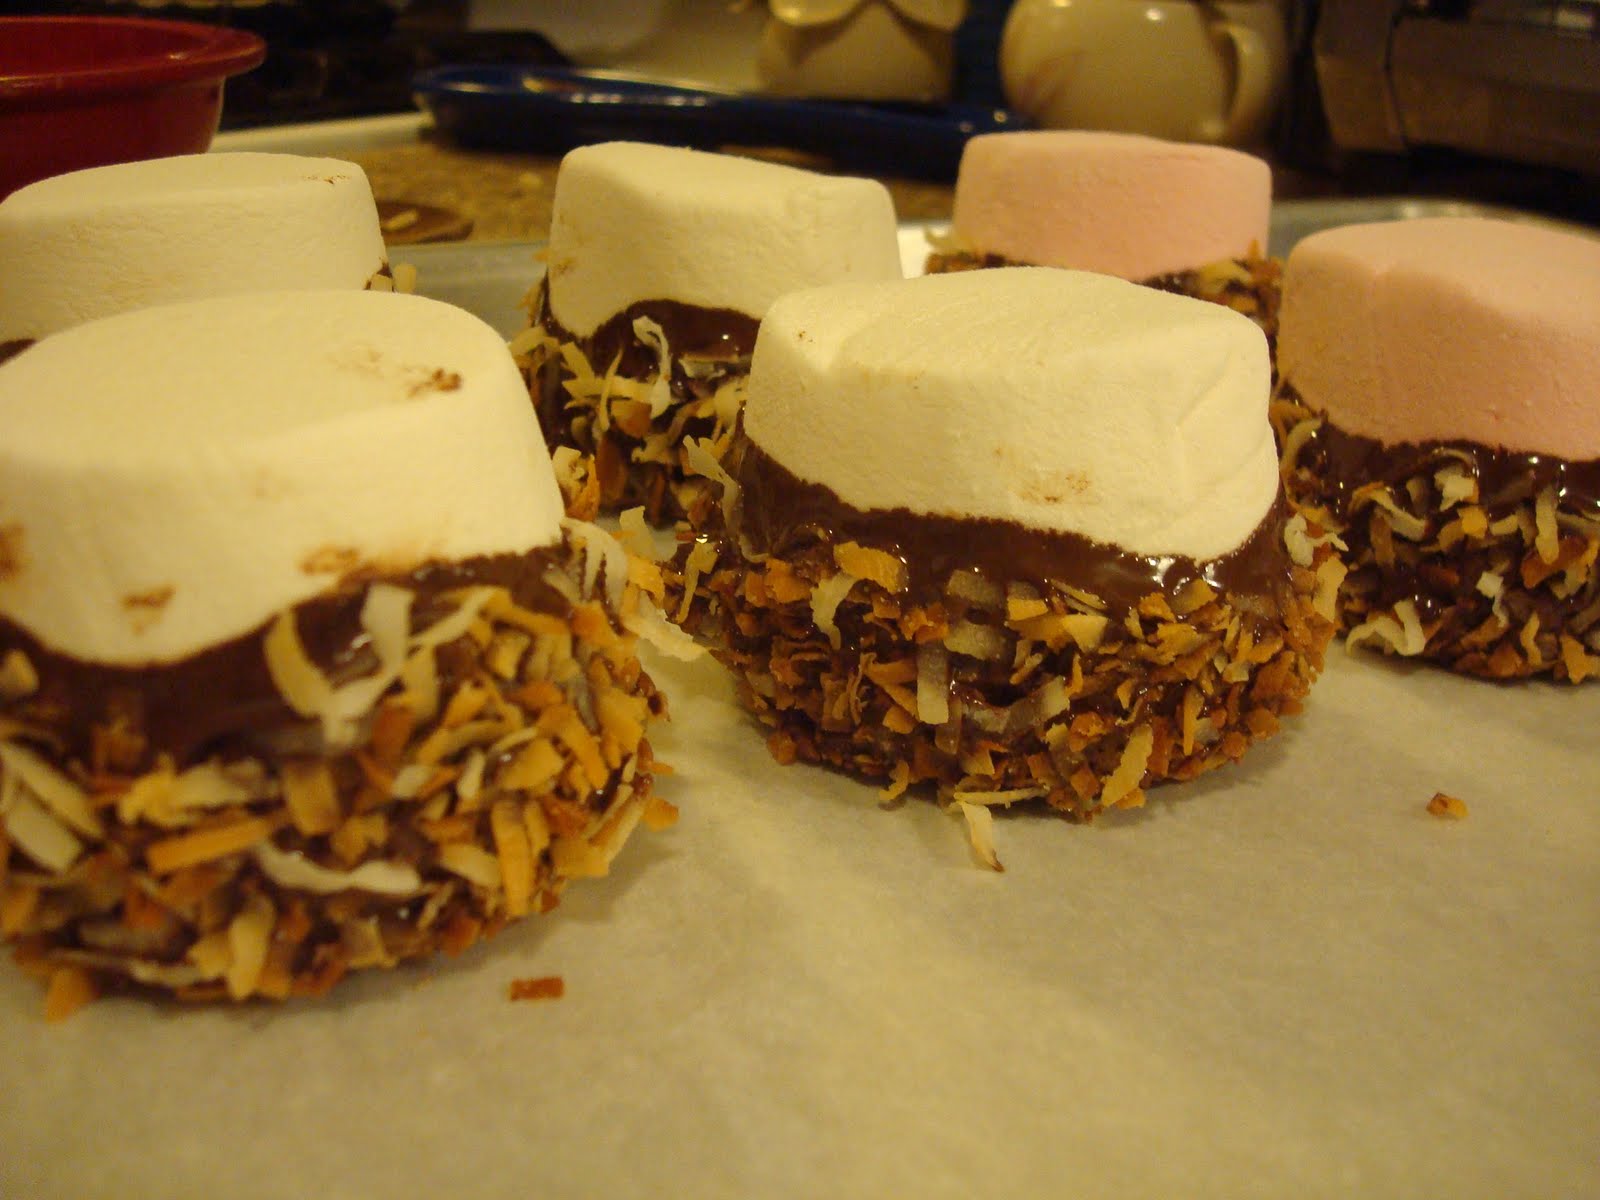
I went shopping today at my friendly neighborhood grocery store and saw something I would have absolutely flipped over as a kid. Giant marshmallows. I mean, Super Gigante Malvavivos, from Mazapan de la Rosa in Jalisco, Mexico. They each weigh a full ounce and come in vanilla and strawberry, all artificially flavored, of course (I crossed my fingers for all-natural, but, alas, no such luck). I cracked up when I saw them and quickly tossed them in my cart, knowing what a kick my kids would get out of them. In the picture below, I've included a bottle of extract to show how huge they are.

They were nearly ransacked before dinner. I had to convince the kids that spaghetti and meatballs was better to eat before eating the super gigante malvavivos (a tough argument). Dinner was quickly dispatched and a few marshmallows devoured. Then, my husband had a brilliant idea, since I had also brought home a few bags of coconut (no, the macaroon madness hasn't ended). Chocolate dipped giant marshmallows rolled in toasted coconut. Did I marry well, or what?

So, I toasted some coconut in a pan. Watch the coconut while it's toasting - it browns very quickly. I held the pan over the flame, not directly on the stove, and kept the coconut moving. Immediately dump the coconut in a bowl to keep it from over-browning. Then, I melted chocolate chips in a metal bowl over a simmering pan of water. When the chocolate is smooth, turn off the heat under the water. Be very careful not to splash any water into the melted chocolate - it will "seize" and be unusable. You won't even be able to re-melt it. I like to keep the bowl over the warm water to keep it pliable.

Prepare a pan with parchment paper. Seriously, get some parchment paper if you don't have any and you won't ever have to spray, butter, or flour a pan again. Wax paper works, too. 


Dip the  bottom 1/2 of the marshmallows (you can use normal size if you can't find the giant ones - it just won't be as fun) in the chocolate, gently swipe the bottom against the edge of the chocolate bowl and dip into the bowl of coconut, pushing some up the sides of the marshmallow. Set this on the parchment and allow to set. If your kitchen is on the warm side, put them in the fridge for a little while. You can also eat them while the chocolate is warm and the marshmallow is a little gooey. I won't judge you. I promise.


Since I had extra chocolate, I dipped a couple marshmallows in the chocolate and didn't roll them in the coconut. Then, I threw a big handful of regular, non-toasted coconut in the remaining chocolate and made little coconut nests. No need to waste any chocolate. As a matter of fact, I believe there is an international law prohibiting such an act. The chocolate police are watching.


Tuesday, April 13, 2010

The Final Words on Macaroon Madness

I think it's time for my macaroon obsession to come to an end. I'll still make them (they're just so easy!), but I don't want to seem like a one-ingredient obsessed baker. So, in this entry, the last word on macaroons (for now), I'll share my experiment with fresh coconut and some other ideas to add to my original recipe (see blog #2).

My daughter and I passed a fresh coconut at the grocery store a few weeks ago. Since I was in the middle of my madness (well, the coconut one), I thought it would be fun to see how the macaroons would taste with fresh coconut.
Cracking the giant nut (actually, it's a seed, but once the husk on the outside is gone, which it always is at the grocery store, it's no longer productive) is a tough task. I used a hammer and a screwdriver to make a couple of holes in the "eyes", poured out the coconut milk inside, and then had to take it outside to crack against the driveway. I'm still hoping the neighbor hasn't called child protection, since it looked like a baby's head in a dish towel. Once the coconut was in pieces, I discarded the tough shell and grated the raw coconut meat. I stored it in the freezer until I was ready to use it. I happened to be making rice pudding, with leftover rice from our Chinese take-out dinner, and used the coconut milk in place of two-thirds of the regular milk. I like to cook my rice pudding by adding the liquid in small amounts, like risotto until it's very creamy. I even tossed in a few shreds of coconut. Very tasty!

In an effort to do the recipe development myself, I didn't turn to the web where there are several recipes, I'm sure. I decided to modify the one I've been using all along. My first run at the recipe produced spongy macaroons (which my husband loved, but didn't satisfy me), so I reduced the egg whites and added a little more flour.

Fresh Coconut Macaroons

5 1/3 cups fresh, grated coconut
2/3 cups granulated sugar
1/2 cup flour
1/4 tsp. salt
3 egg whites
1 tsp. almond extract

Preheat oven to 325 degrees. Combine the first 4 ingredients, then add the egg whites and almond extract. Scoop with a small ice cream scoop or spoon onto a parchment covered baking sheet. Bake for 20-30 minutes, until golden brown.

I found these macaroons to be a little more nutty than the ones made with sweetened shredded coconut in the bag. Not that there's anything wrong with that.


Back to the original recipe and my can't-leave-a-good-recipe-alone twists:

Chocolate Macaroons

3 tbsp cocoa powder (the good stuff, please, ie. Scharffen Berger)
1 tsp orange flower or rose flower water
I happened to be out of good cocoa when I made this recipe. But, I had something even better - Persian Cocoa from Golden Fig. It's a lovely blend of French cocoa powder, rose powder, cardamom, and orange powder. Oh my, what a macaroon! I certainly did the food dance after eating this one. You can buy the Persian Cocoa at Golden Fig, 790 Grand Ave., St. Paul, MN or online at http://www.goldenfig.com/. Or, try Golden Fig's Northern Woods Cocoa with cinnamon and maple powder. Add a pinch of cayenne for a little Mayan heat.

Pina Colada Macaroons

1/2 cup diced dried pineapple
1 tsp. orange flower water or, if you can find it, pineapple extract

This was another hit in the family. For a variation, and because one of the things I like most about coconut macaroons is the chewy edges, I flattened out the macaroon to around 1/2" before baking (see the macaroon on the left in the photo). If you're like me and are an edge nibbler, this is the ultimate way to make the macaroons.


Cherry Chocolate Macaroons


1/2 cup coarsely chopped dried cherries
1/3 cup dark or semi-sweet small chocolate chips (or roughly chop up the regular size)
1 tsp almond extract

I haven't made this recipe yet, but it sounds so very tasty to me.


Curried Macaroons


1 tsp sweet curry (again, I love the blend from Golden Fig)
1/2 cup chopped dried mangoes
1 tsp orange flower water


Another untested recipe, but one would think coconut and curry would be a match made in Kashmir.


One thing I've noticed on my macaroon journey is how important it is to judge the doneness (is that a word?) by the eye. There have been times when it took an extra 15-20 minutes to get the golden brown I wanted. It's probably my uncalibrated oven, but I'm used to the watch-and-see game with whatever I bake. I also put a few unbaked coconut macaroons in the freezer to bake at a later date. I'll let you know how those come out. Wouldn't that be nice to be able to bake off a few at a time? Then, you can have fresh macaroons anytime you crave them. Midnight snack, anyone?


I'd love to hear your suggestions for other additions to coconut macaroons. I'm sure if I had 50 bags of coconut, I could come up with 50 variations on the recipe. Or, just leave me on a desert island full of coconuts. I'll need my oven, please. And, a swanky camper with indoor plumbing. And, loads of tea and milk. Maybe I'd tire of coconut macaroons after a year or so, but probably not.